Tare7 customer manual

Open in a new tab ↗

A calmer way to finish the work.

Follow the path that matches your business. Every guide tells you where to go, what to enter, what should happen next, and what to capture if it does not.

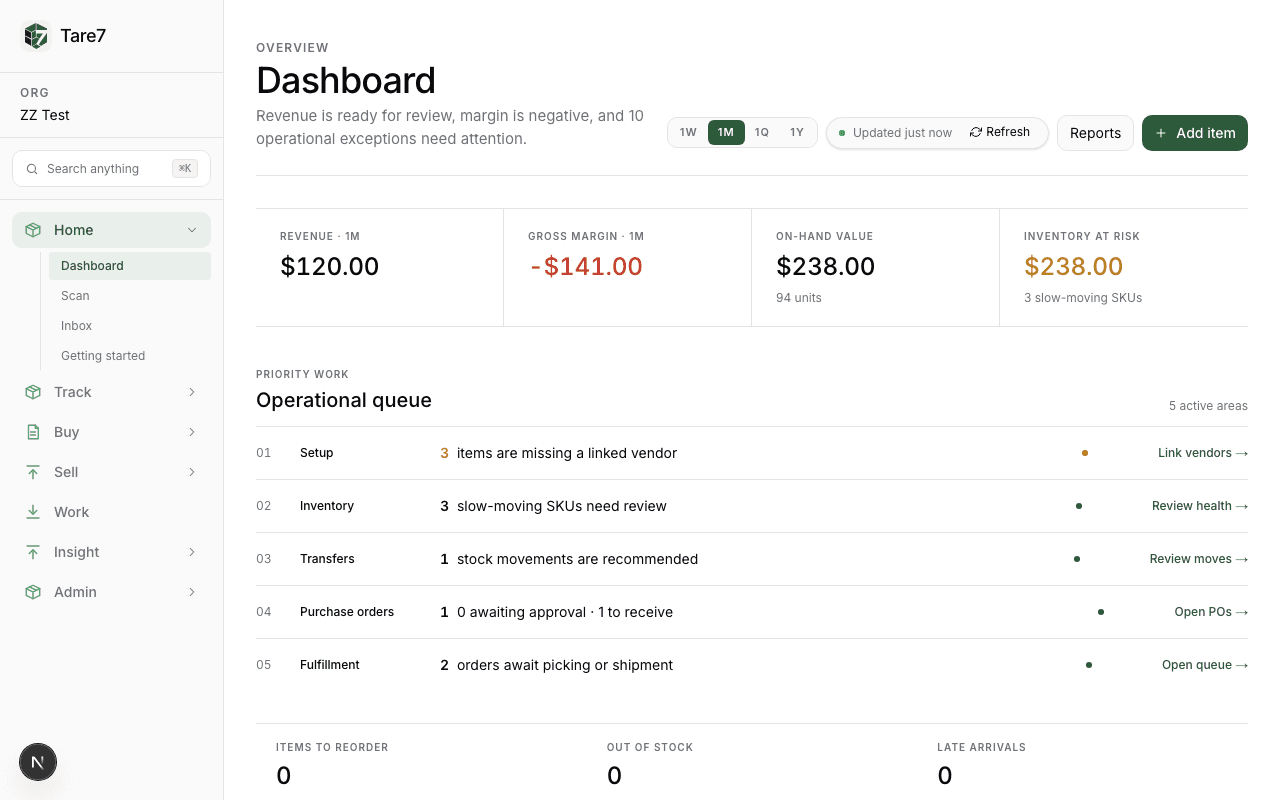
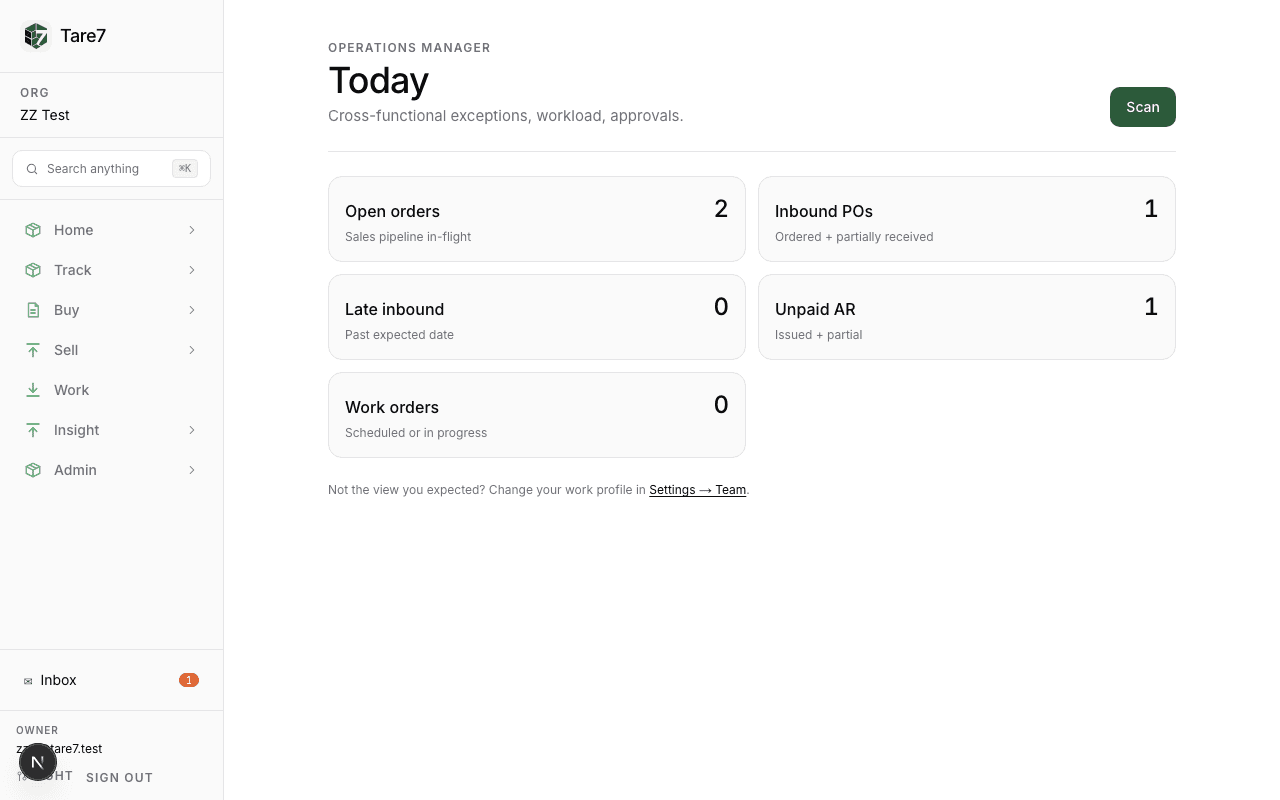
Tare7 Today view

Table of contents

Jump to the answer.

Use the sections for a guided tour, or search for the exact task you need. Each result jumps to the instructions and screenshot.

Start here

Set up once, then follow the work.

1

Choose your experience

Choose Mobile Service, Mobile Retail, or Inventory Operations. Tare7 tunes the language and starting views to the way you work.

2

Complete Getting started

Open Home → Getting started. Complete the essential action first, then follow the next recommended actions.

3

Run the first real workflow

Use the task cards below. Do not create duplicate records just to test—save the result and check its history.

Getting started checklist

Experiences

Instructions for the work you do.

Mobile Service

Run the whole visit from the first customer call to the billing handoff.

Jobs → New job

Create and schedule a job

  1. 1Choose the customer and select an existing service location or add one in the flow.
  2. 2Add the work description, price, and materials if known.
  3. 3Choose Exact time, Arrival window, Any time that day, or Schedule later.
  4. 4Assign a technician and save.
You should see: The job and first visit are created together; the schedule shows the right customer site and assignee.
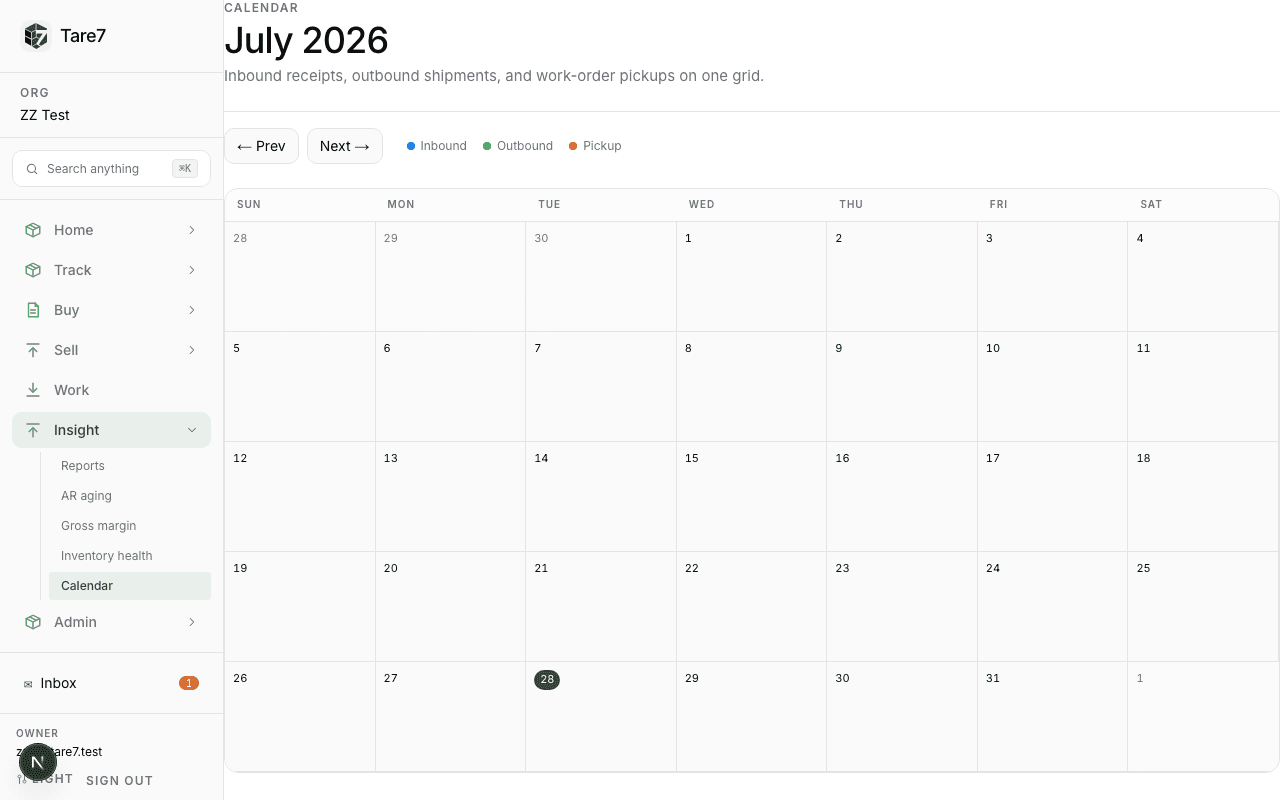
Schedule calendar
Example screen — your records and totals will reflect your organization and experience.

Jobs → Open job

Dispatch and complete a visit

  1. 1Open the visit and choose En route when the technician leaves.
  2. 2Choose In progress on arrival.
  3. 3Use No access only with a reason when the customer or site cannot be reached.
  4. 4Choose Complete, review the work and materials, and confirm the billing handoff.
You should see: The visit has an auditable status trail and completion is safe to retry without duplicate billing lines.
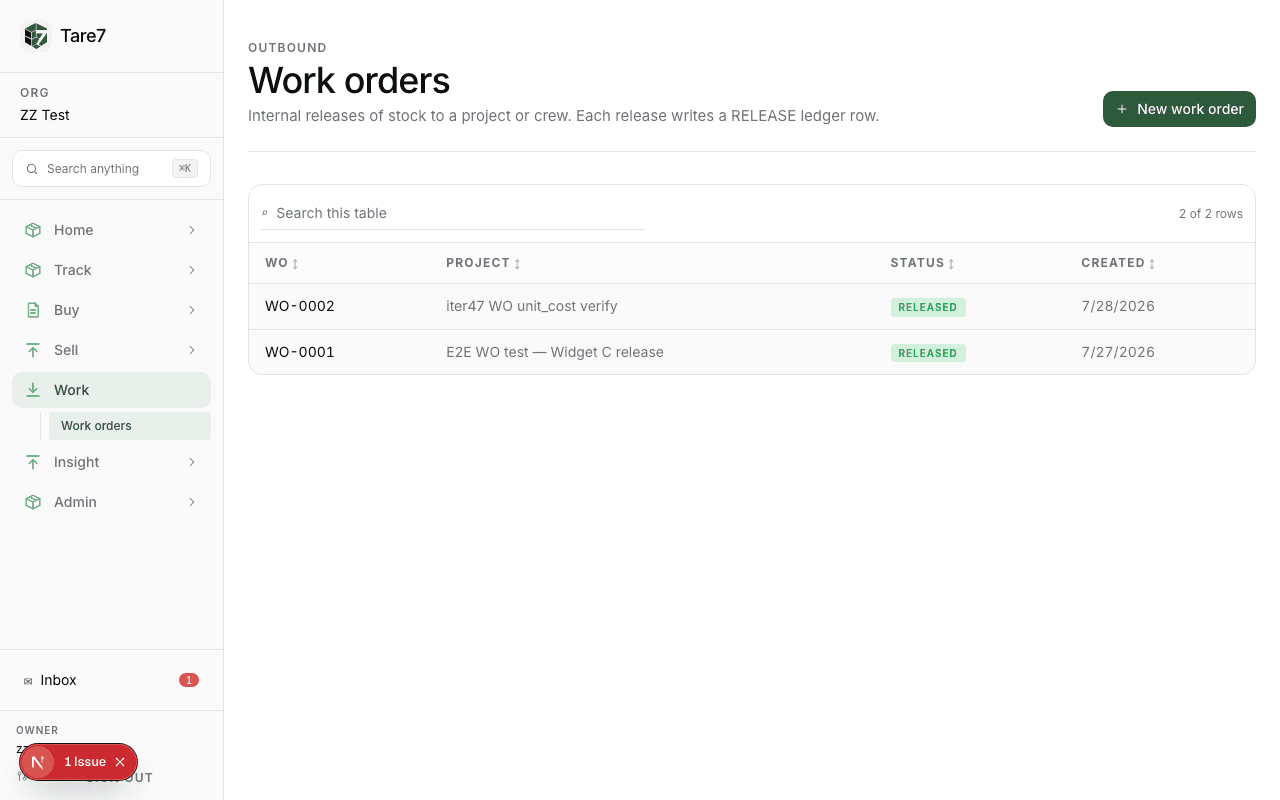
Released work order
Example screen — your records and totals will reflect your organization and experience.

Mobile Retail

Sell from a tablet, truck, booth, or street fair while keeping stock current.

Sell → Register

Ring up a sale

  1. 1Open Register and add items by search, barcode, or photo.
  2. 2Review quantity, tax, discount, and total.
  3. 3Collect payment outside Tare7, then record the tender method.
  4. 4Open the receipt or sale record to confirm the stock deduction.
You should see: The sale is recorded and stock stays current; Tare7 records the external payment method but does not process the payment.
Retail register sale
Example screen — your records and totals will reflect your organization and experience.

Inventory Operations

Know what came in, what went out, and what needs attention next.

Track → Inventory

Receive, move, and pick stock

  1. 1Receive incoming stock against a purchase order.
  2. 2Move stock between locations when it changes hands.
  3. 3Use Pick lists to reserve and pick an order.
  4. 4Open the item movement history to verify each change.
You should see: The shelf, warehouse, and order queue describe the same inventory reality.
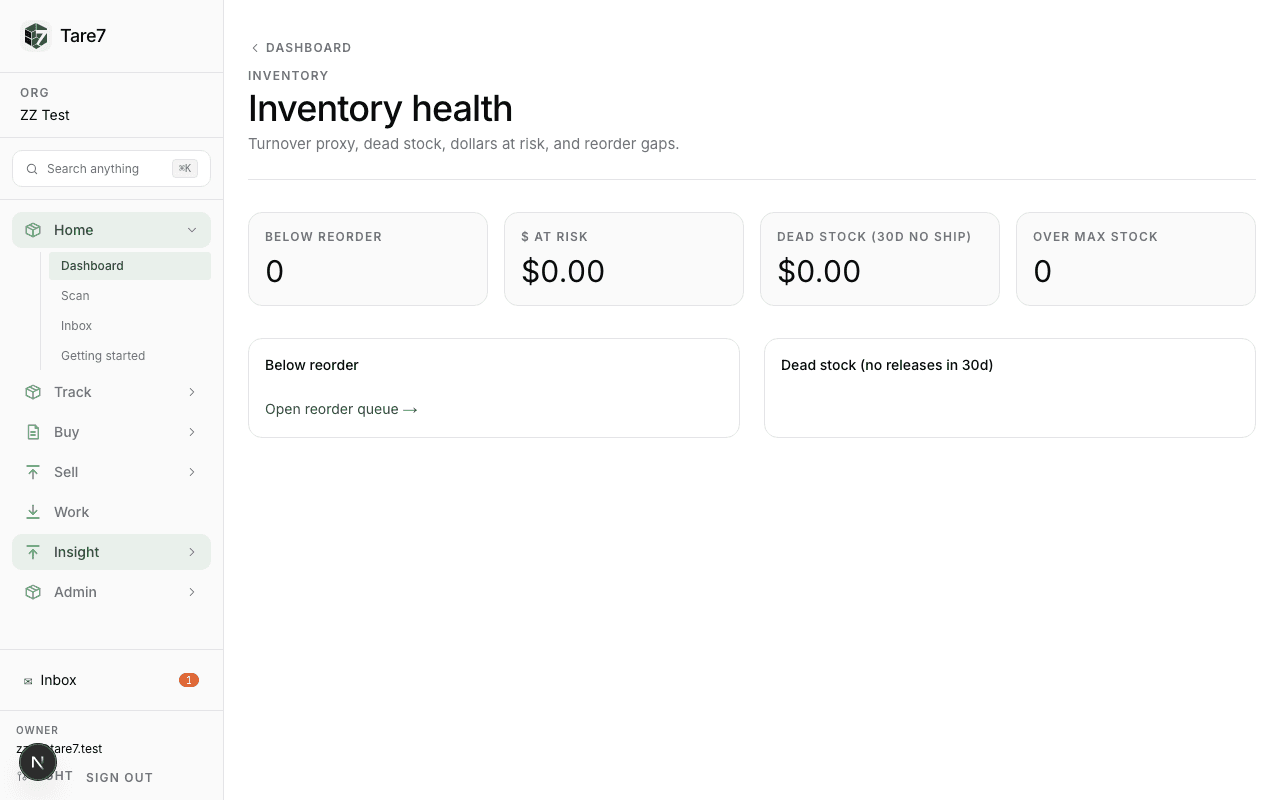
Inventory health dashboard
Example screen — your records and totals will reflect your organization and experience.

Plan guides

Use the instructions included with your plan.

Solo

For owner-operators who need a clear view of stock and daily work.

Includes: Today, Inventory, Locations, Scan, Cycle counts, Reports, Settings

Track → Inventory → Add item

Add your first item

  1. 1Open Track in the left navigation and choose Inventory.
  2. 2Select Add item.
  3. 3Enter a name, SKU, unit, cost, selling price, reorder point, and quantity. Add a photo when the item is hard to identify.
  4. 4Choose Save item.
You should see: The item appears in your list with an on-hand quantity and reorder status.
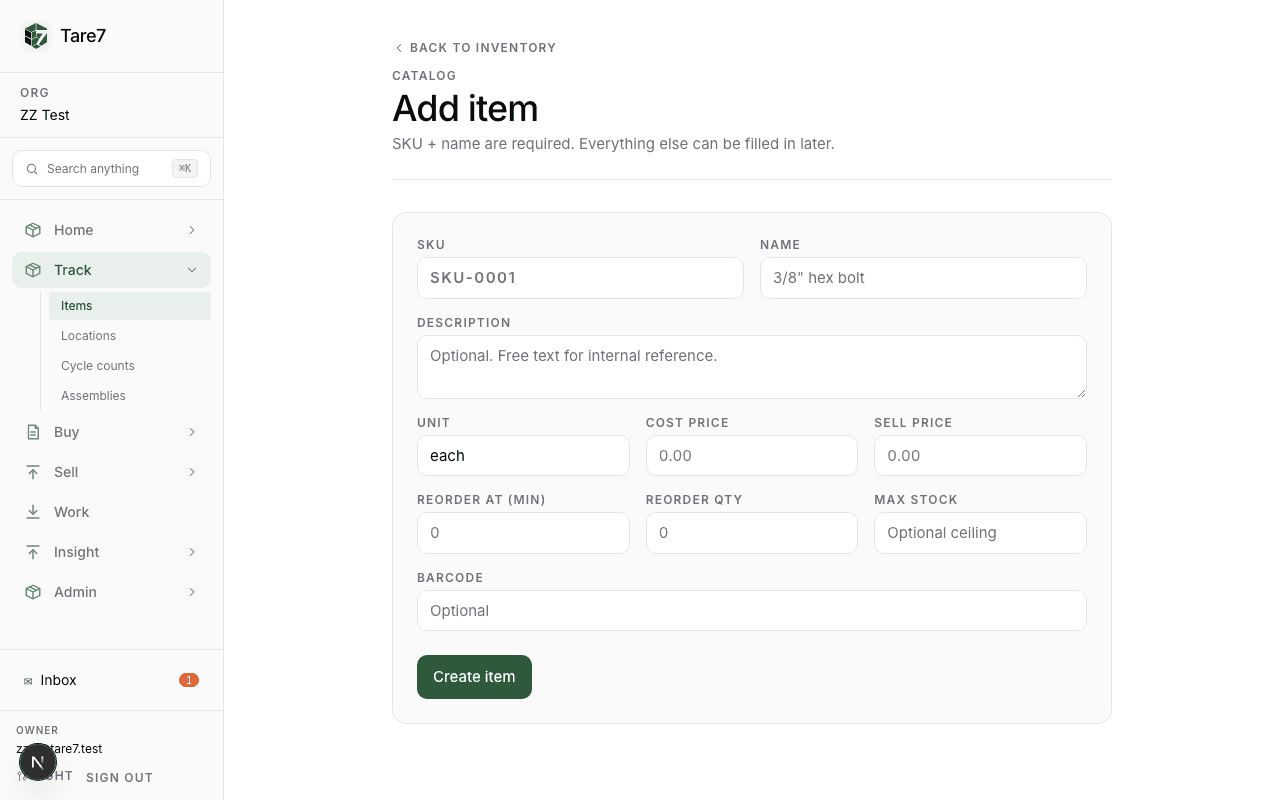
New inventory item form
Example screen — your records and totals will reflect your organization and experience.

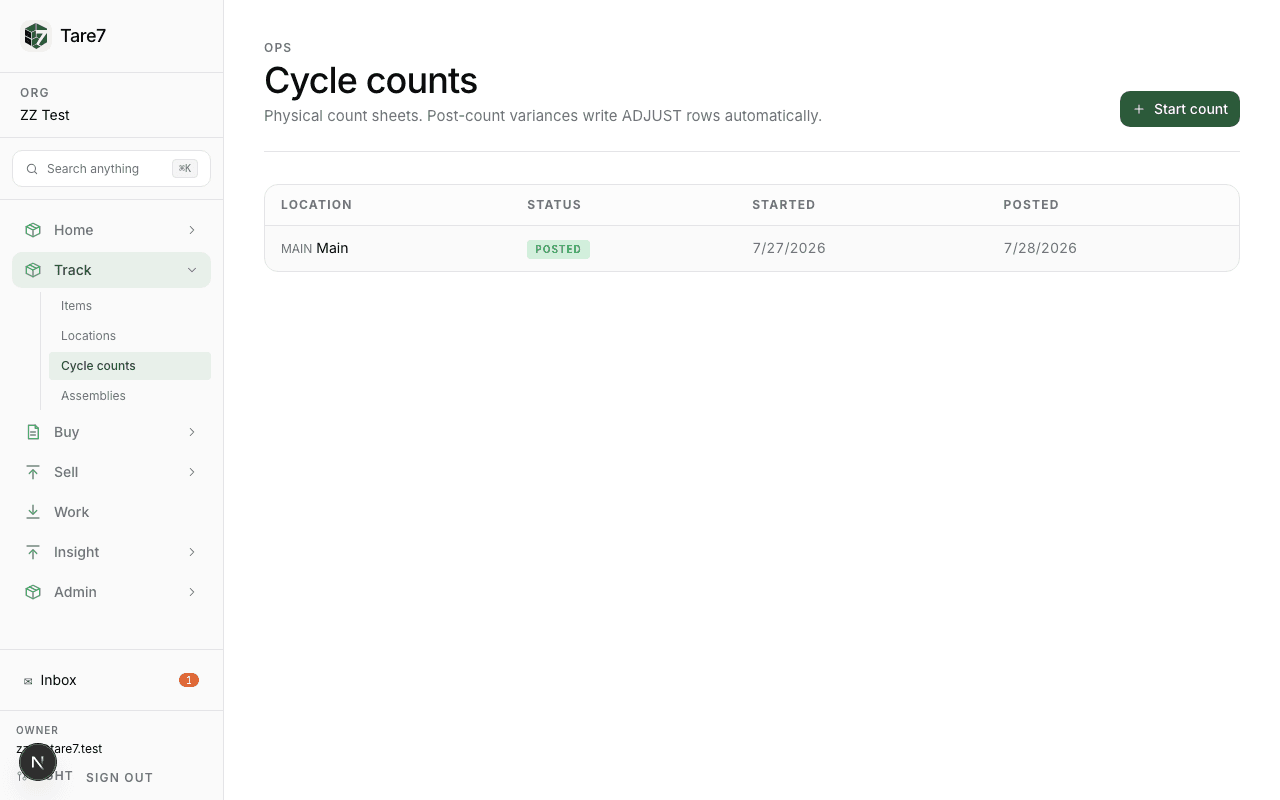
Track → Cycle counts

Count and correct a location

  1. 1Open Cycle counts and choose New count.
  2. 2Select the location and the items to count.
  3. 3Enter the physical quantity. Use the variance column to review differences.
  4. 4Submit the count, then confirm the adjustment in the item movement history.
You should see: The count is recorded as an auditable stock movement; the item quantity is no longer a guess.
Cycle count sheet
Example screen — your records and totals will reflect your organization and experience.

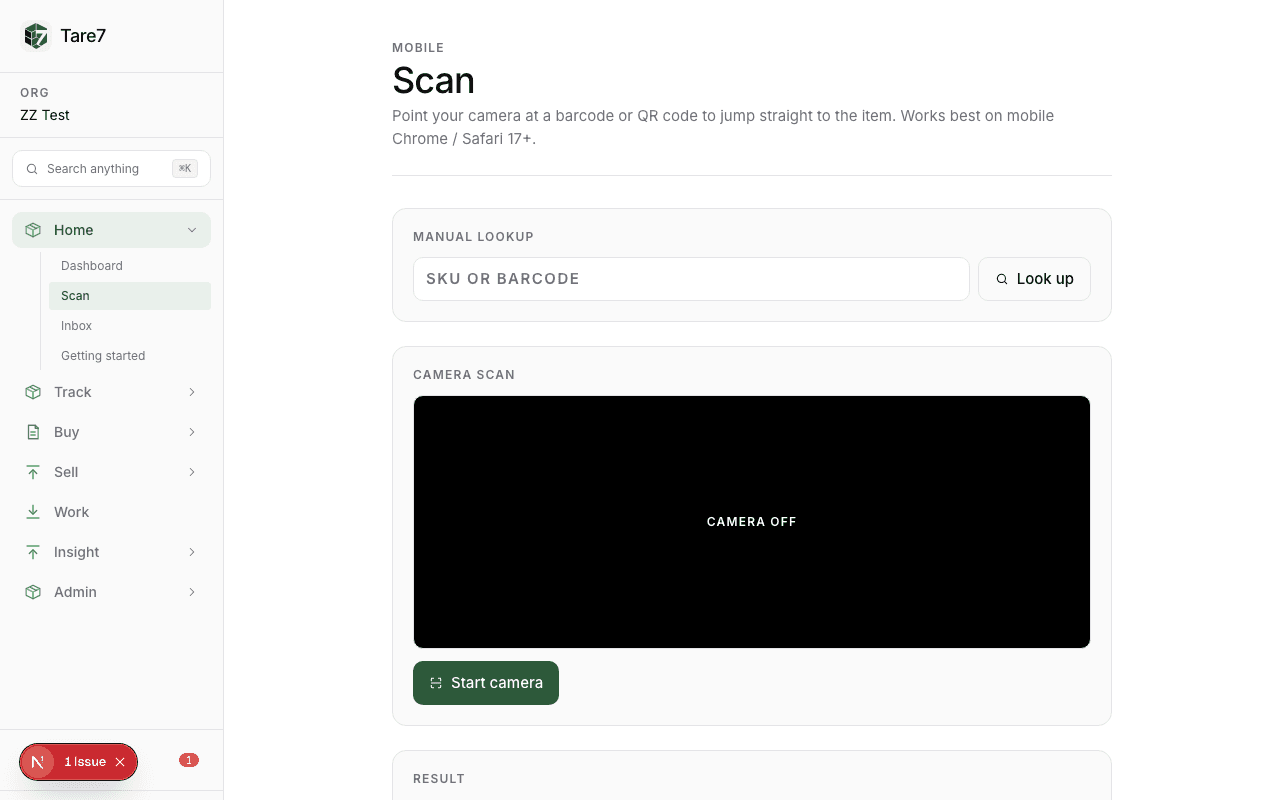
Track → Scan

Find an item by barcode

  1. 1Open Scan on a phone or tablet.
  2. 2Allow camera access, then scan the barcode.
  3. 3Open the matching result to see quantity, location, reorder point, and movement.
  4. 4If there is no match, choose Create item and finish the item form.
You should see: You can identify stock without memorizing SKU names.
Barcode scan result
Example screen — your records and totals will reflect your organization and experience.
Mobile

For owner-led mobile service and mobile retail businesses working from phones and tablets.

Includes: Everything in Solo, plus a second seat, a second location, unlimited items, and the Mobile Service and Mobile Retail experiences

Jobs → New job

Create and schedule a service job

  1. 1Choose the customer and service location.
  2. 2Add the work description, price, and materials if known.
  3. 3Choose an exact time, arrival window, any time that day, or schedule later.
  4. 4Assign the visit and save.
You should see: The job and visit appear together in the schedule, ready for field progress and completion.
Schedule calendar
Example screen — your records and totals will reflect your organization and experience.

Sell → Register

Ring up a mobile sale

  1. 1Add items by search, barcode, or photo.
  2. 2Review quantity, tax, discount, and total.
  3. 3Collect payment using your external payment method, then record the tender in Tare7.
  4. 4Open the sale record and confirm the stock deduction.
You should see: The sale and inventory movement stay connected without Tare7 processing the payment.
Retail register sale
Example screen — your records and totals will reflect your organization and experience.
Team

For small teams that buy, receive, sell, and fulfill from the same record.

Includes: Everything in Mobile, plus vendors, purchasing, receiving, reorder queue, invoices, customers, quotes, sales orders, returns, and pick lists

Buy → Vendors → Add vendor

Add a vendor

  1. 1Open Vendors and select Add vendor.
  2. 2Enter the supplier name, contact, payment terms, and ordering details.
  3. 3Save the vendor, then add item pricing if you have a preferred cost.
You should see: Purchasing and receiving can now point back to the correct supplier.
Vendor list
Example screen — your records and totals will reflect your organization and experience.

Buy → Purchase orders

Create and receive a purchase order

  1. 1Choose New purchase order and select a vendor.
  2. 2Add items, quantities, expected date, and destination location.
  3. 3Submit the order for approval if your role requires it.
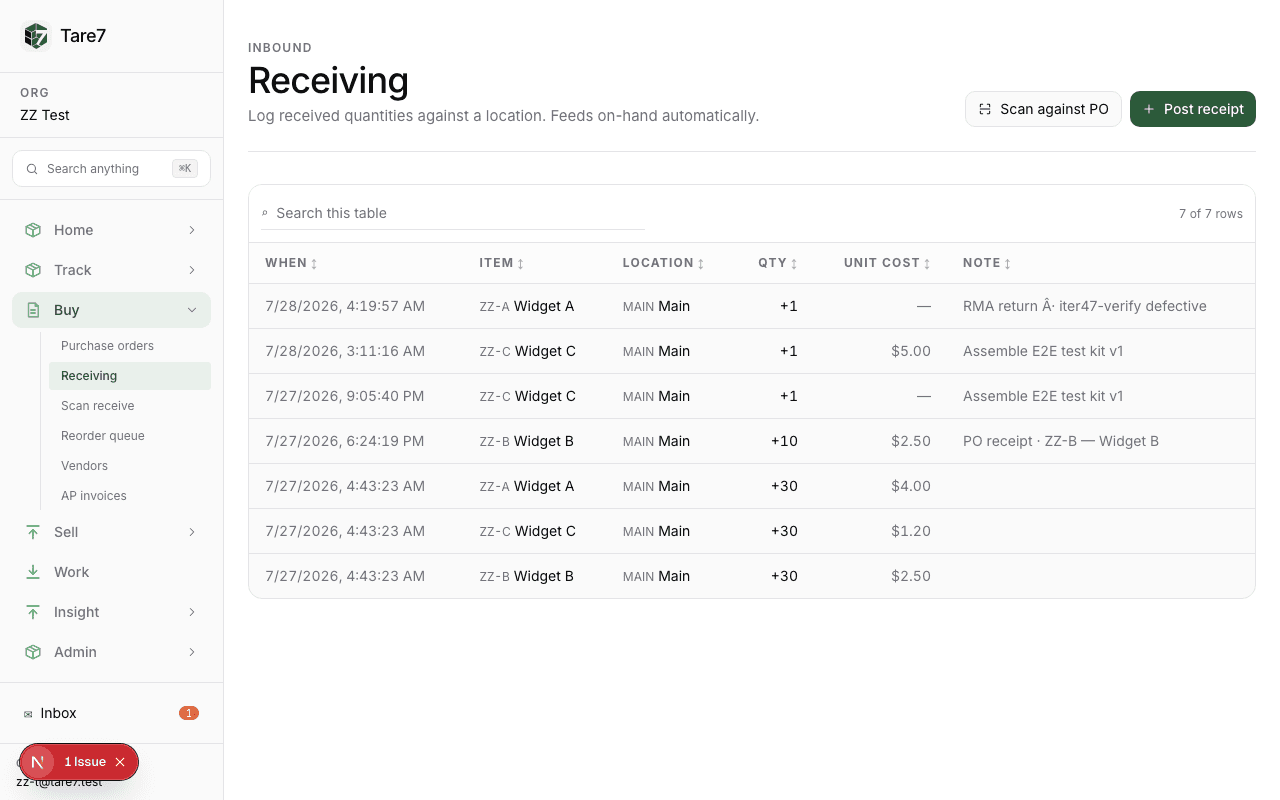
  4. 4When delivery arrives, open Receiving, select the purchase order, enter the quantities received, and post the receipt.
You should see: On-hand stock and the purchase record update together; partial deliveries remain open.
Post receiving form
Example screen — your records and totals will reflect your organization and experience.

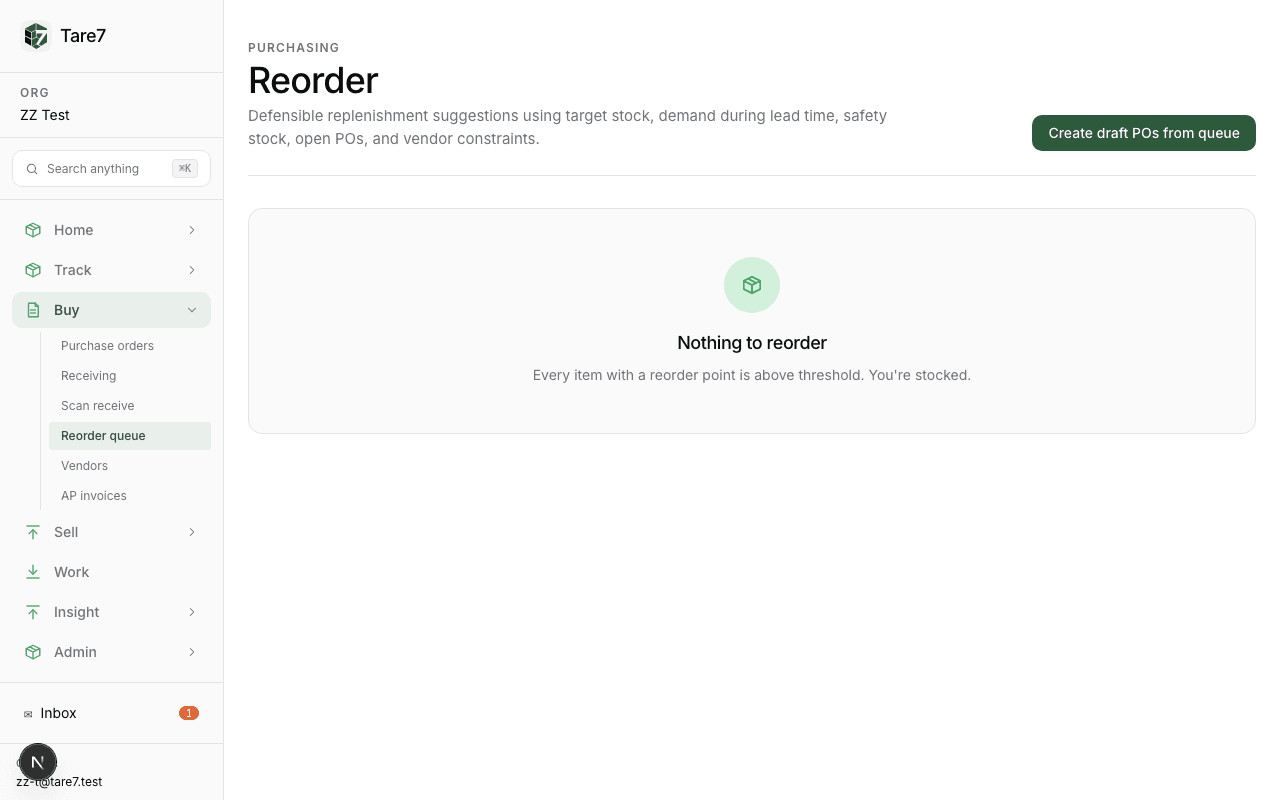
Buy → Reorder

Work the reorder queue

  1. 1Open Reorder to see items at or below their reorder point.
  2. 2Review suggested quantities and vendor prices.
  3. 3Select the items to draft, then create a purchase order.
  4. 4Review and submit the order using your normal approval process.
You should see: The queue turns a low-stock alert into a purchase decision without re-keying every SKU.
Reorder drafts
Example screen — your records and totals will reflect your organization and experience.

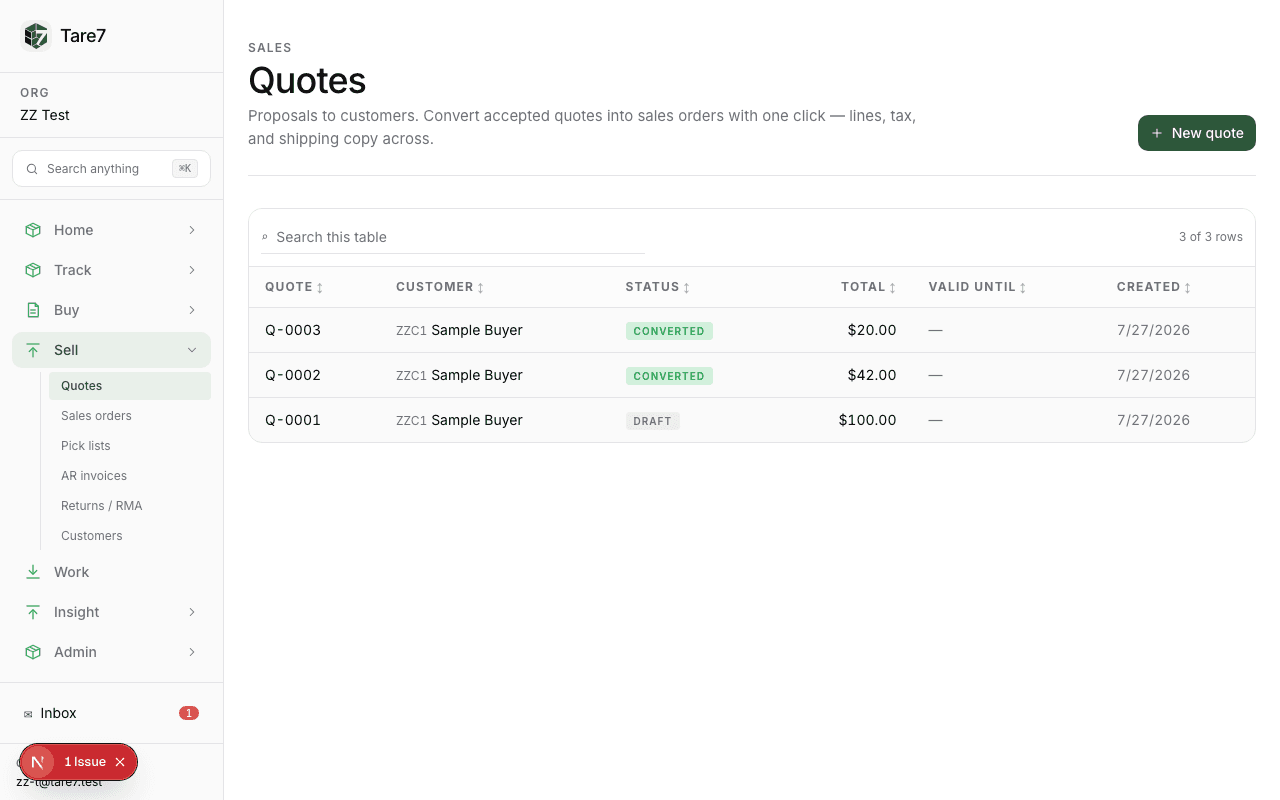
Sell → Customers → New customer

Create a customer and quote

  1. 1Create the customer with contact and billing details.
  2. 2Open Quotes and choose New quote.
  3. 3Select the customer, add lines, tax, notes, and an expiration date.
  4. 4Save the quote, then send or convert it when the customer accepts.
You should see: The customer, quote, and future invoice share one record instead of three spreadsheets.
Created quote
Example screen — your records and totals will reflect your organization and experience.

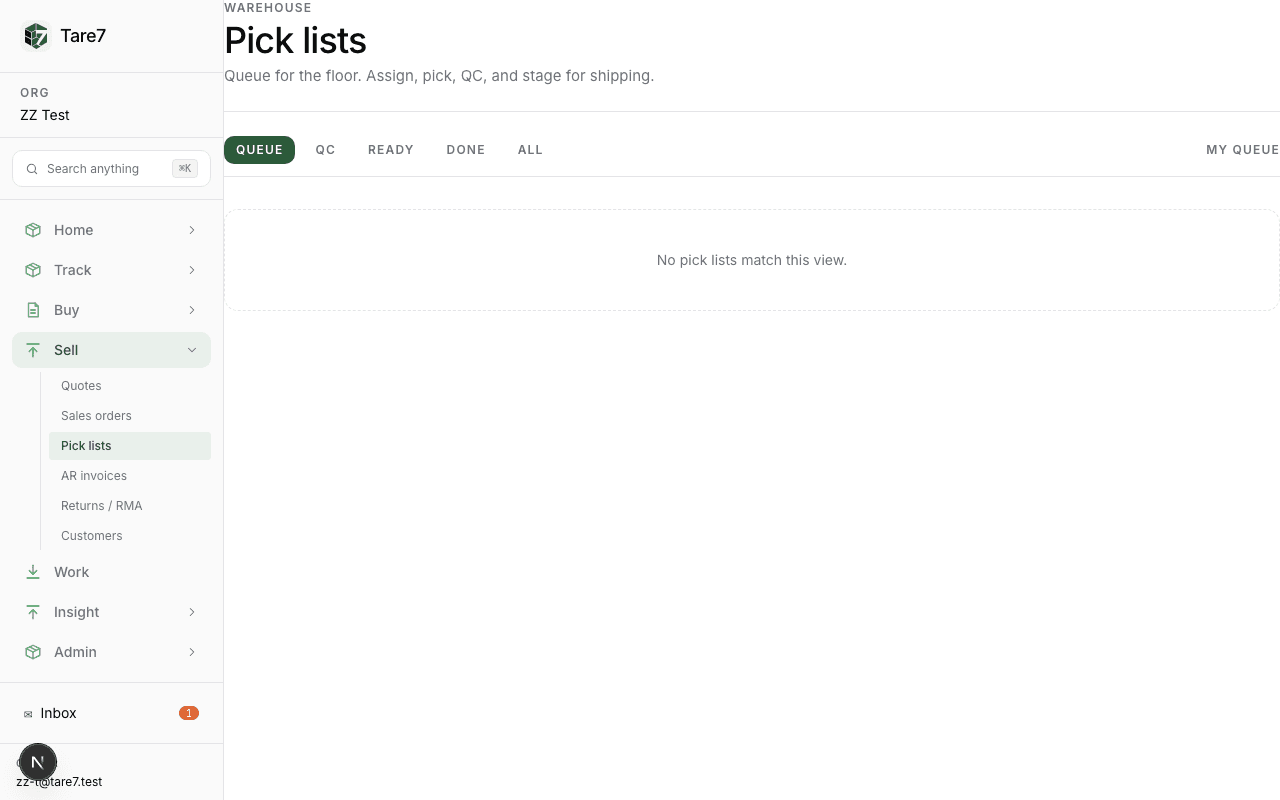
Sell → Sales orders → Pick lists

Release an order for picking

  1. 1Open the sales order and confirm the customer and line quantities.
  2. 2Choose Release for picking.
  3. 3Open Pick lists, select the order, and pick each line from its location.
  4. 4Confirm the pick, then ship or hand off the order.
You should see: The order status, inventory, and fulfillment queue stay aligned.
Pick list queue
Example screen — your records and totals will reflect your organization and experience.

Sell → Invoices / Returns

Review an invoice or return

  1. 1Open Invoices and select the customer record.
  2. 2Review line items, tax, payment status, and notes.
  3. 3For a return, open Returns, choose the original order, select lines and reason, and submit.
  4. 4Confirm the inventory and credit outcome before closing the record.
You should see: Every adjustment has a reason and a traceable customer document.
Accounts receivable invoice detail
Example screen — your records and totals will reflect your organization and experience.
Scale

For growing operations that need control, visibility, and explainable changes.

Includes: Everything in Team, plus bins, serials, audit log, portals, public API, webhooks, exports, and advanced reports

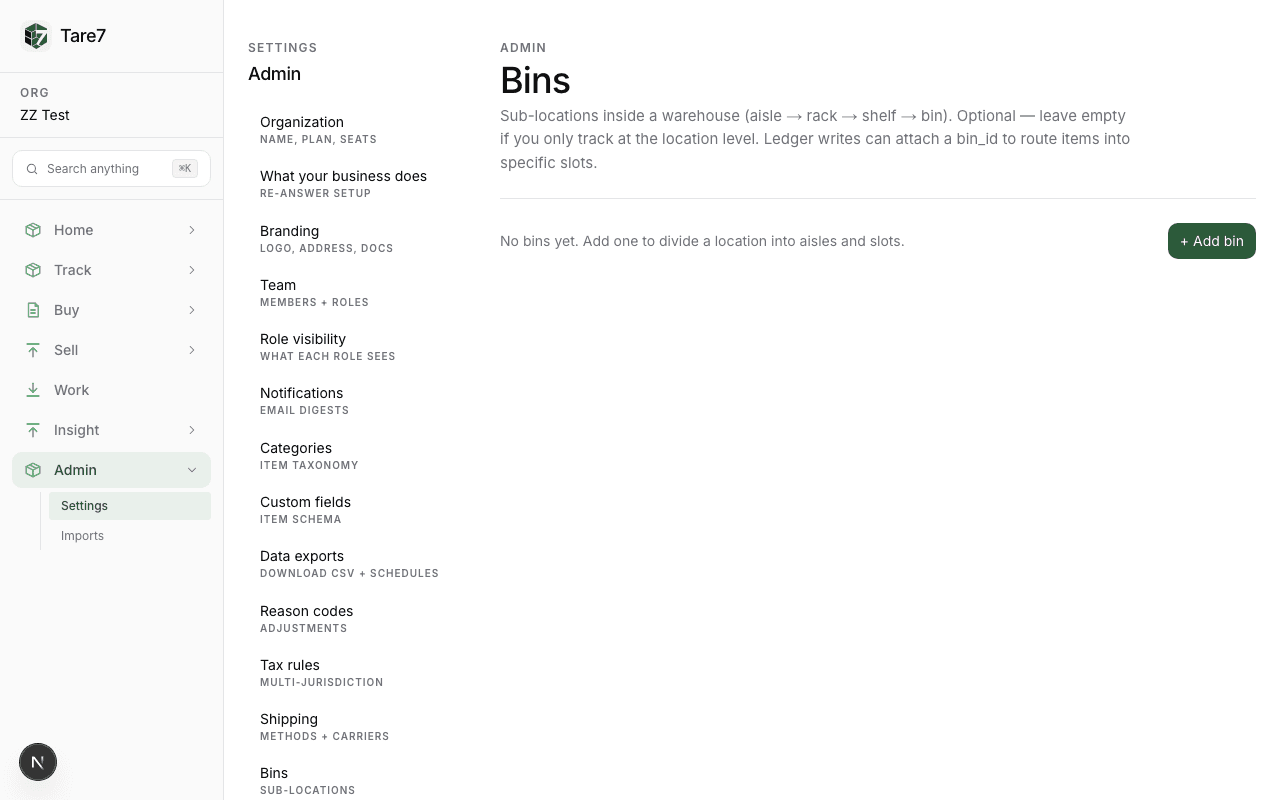
Track → Locations → Bins

Organize bins and locations

  1. 1Create the warehouse or stock location first.
  2. 2Add a bin tree that matches the physical space.
  3. 3Assign items to bins during receiving or an adjustment.
  4. 4Use the bin view when picking or counting.
You should see: A picker can find the item and a manager can explain where the quantity came from.
Bin location tree
Example screen — your records and totals will reflect your organization and experience.

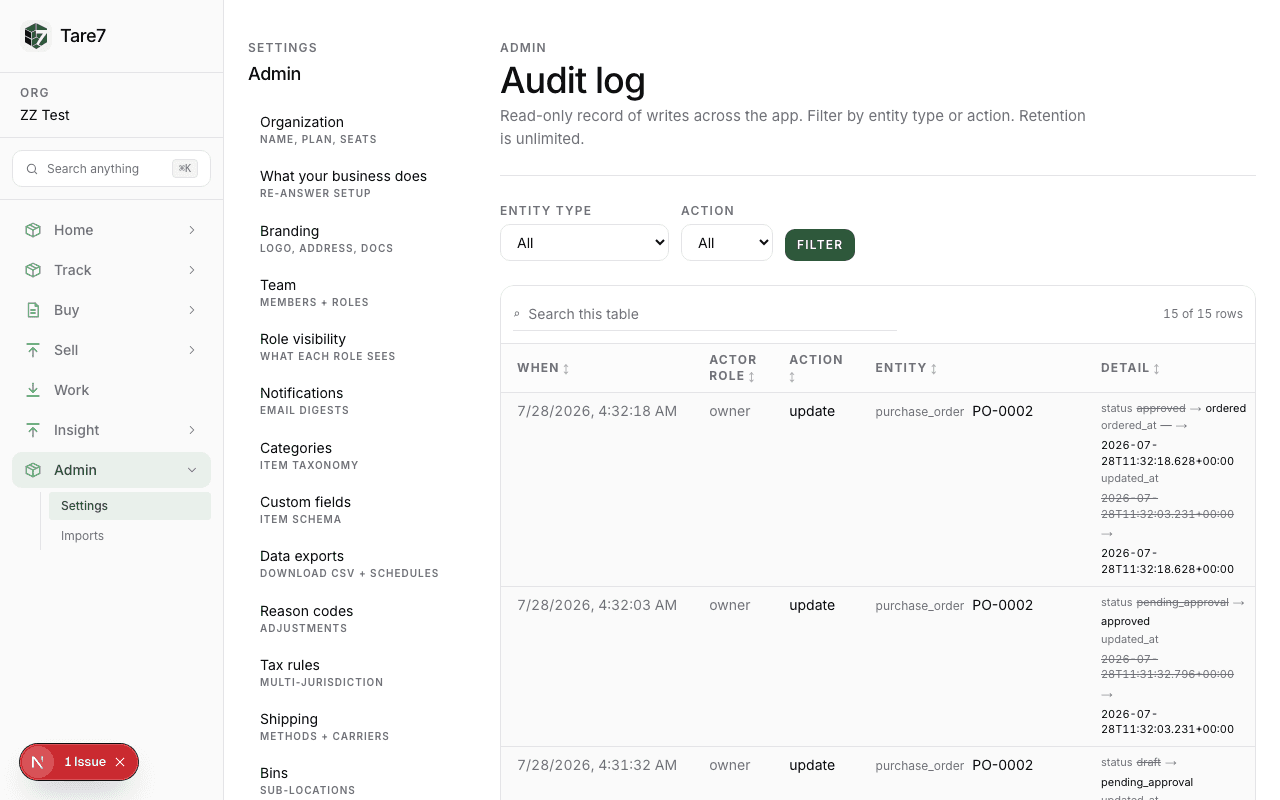
Admin → Audit log

Investigate a change

  1. 1Open Audit log and filter by date, user, entity, or action.
  2. 2Open an event to see the before and after values.
  3. 3Record the event ID when escalating a discrepancy.
You should see: You can answer who changed what and when without guessing.
Filtered audit log
Example screen — your records and totals will reflect your organization and experience.

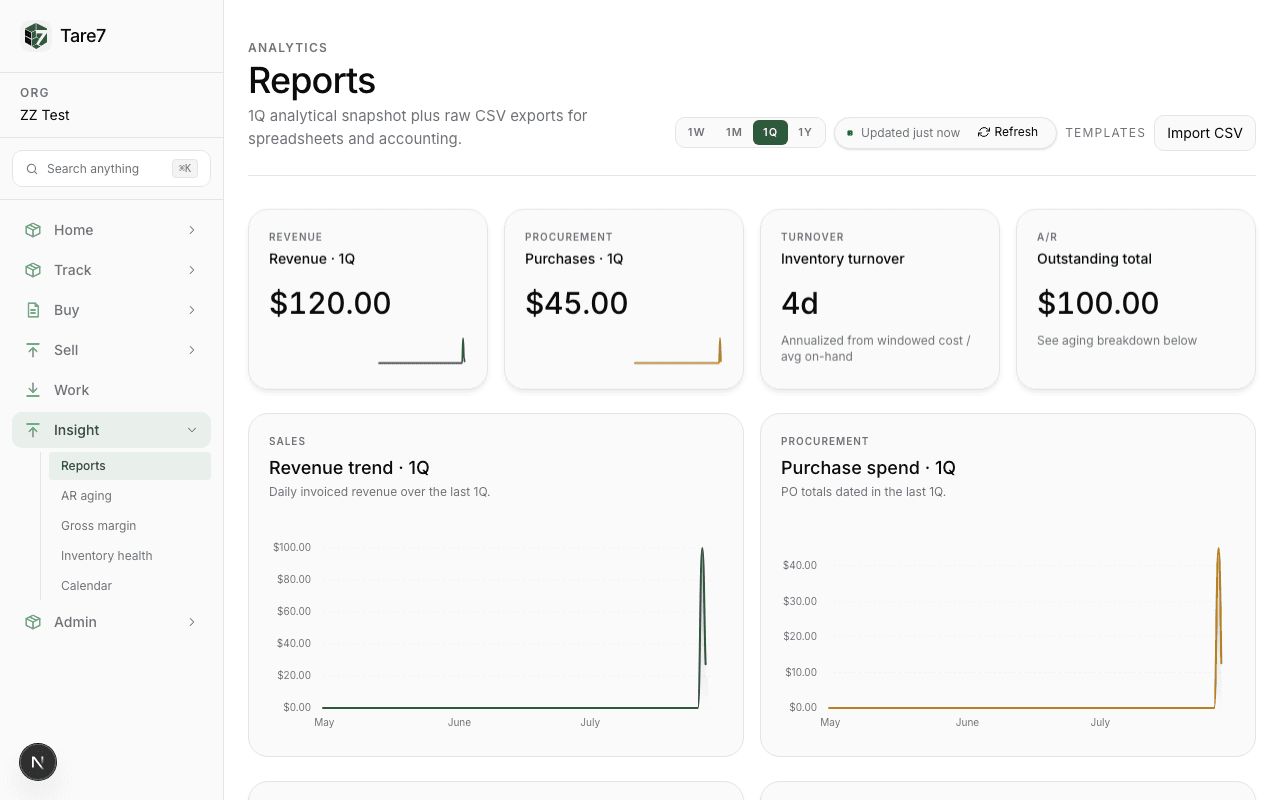
Insights → Reports

Export an operational report

  1. 1Open Reports and choose the report that matches the question.
  2. 2Set the date, location, customer, or status filters.
  3. 3Review the totals and download the export for finance or operations.
You should see: The exported report preserves the filters used to create it.
Reports overview
Example screen — your records and totals will reflect your organization and experience.

Everyday answers

The tasks people usually get stuck on.

These instructions apply across plans. Follow them in order, and stop when the expected result appears. If a control is not visible, your plan or role may not include it.

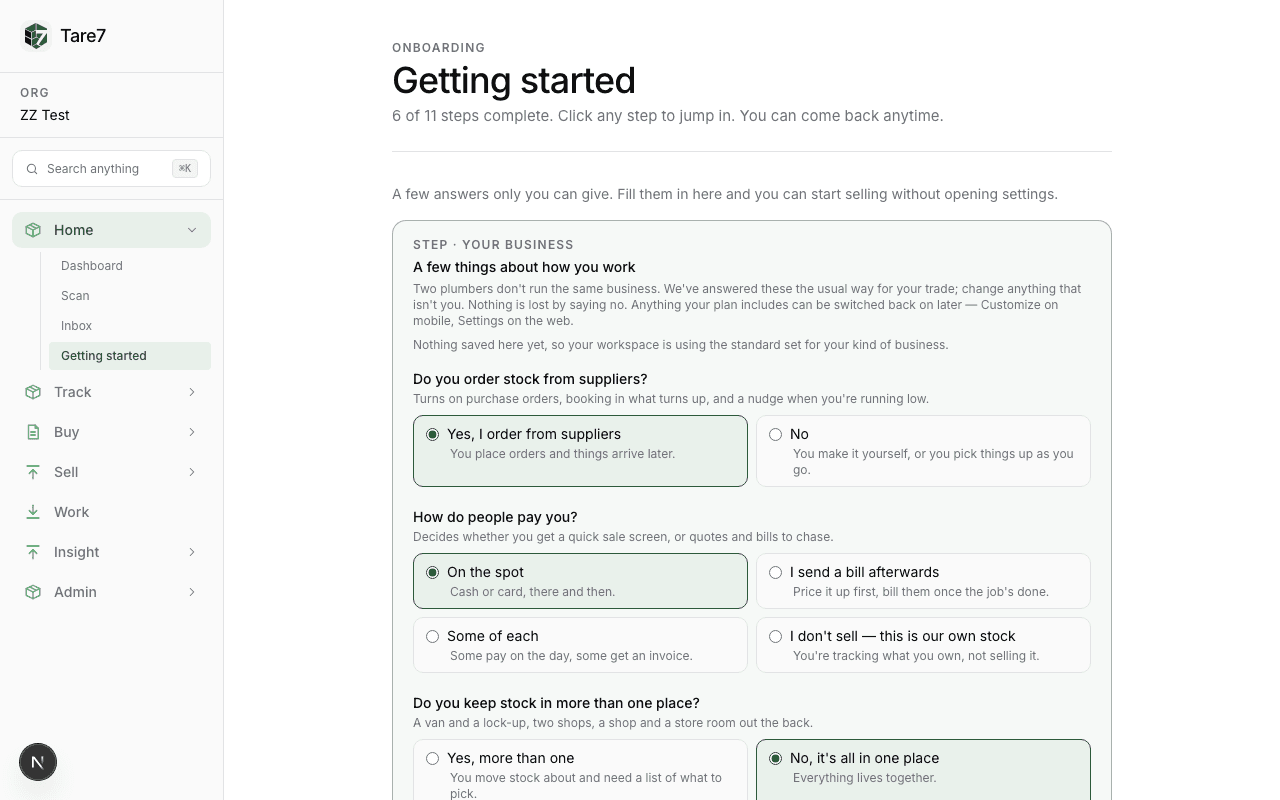
Home → Getting started

Complete your business profile

  1. 1Open Home and select Getting started.
  2. 2Choose the experience that matches the work you do most often.
  3. 3Complete the first essential setup action shown.
  4. 4Continue with the next recommended actions; expand All setup tasks only when you need the complete list.
  5. 5Return to the checklist and confirm each required item as you finish it.
You should see: Your navigation and defaults match your business. If you choose the wrong experience, change it from Settings → Organization; existing records are preserved.
Getting started checklist
Example screen — your records and totals will reflect your organization and experience.

Admin → Team

Invite a teammate and set access

  1. 1Open Admin, then Team, and choose Invite member.
  2. 2Enter the person’s name and email address.
  3. 3Choose the smallest role that lets them do their job; do not use Owner for routine work.
  4. 4Send the invitation and ask the teammate to accept it from their email.
  5. 5Return to Team and confirm the member is Active before expecting them to see records.
You should see: The teammate can see only the work allowed by their role. If they cannot see a menu, check role visibility before changing their role.
Role visibility settings
Example screen — your records and totals will reflect your organization and experience.

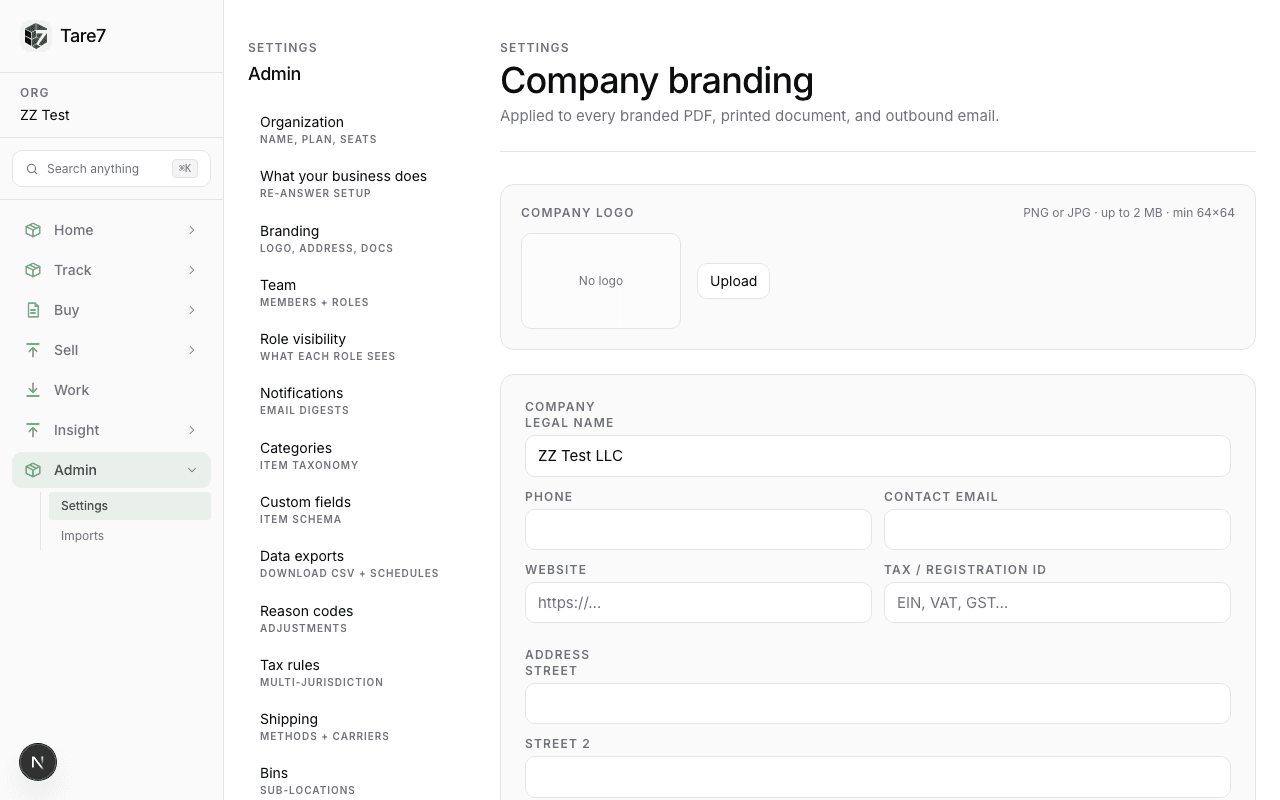
Admin → Settings → Branding

Add your logo for invoices

  1. 1Open Settings and choose Branding.
  2. 2Choose Upload logo and select a clear PNG or JPG of your business logo.
  3. 3Use a square or horizontal image with a transparent or plain background; keep it under the upload limit shown on screen.
  4. 4Use Preview to check that the logo is readable on a white invoice.
  5. 5Save branding, then open a draft invoice and confirm the logo appears before sending it.
You should see: New invoices use your logo and business identity. If it looks blurry, upload a larger source image with extra whitespace around the mark; do not upload a screenshot of a logo.
Branding settings
Example screen — your records and totals will reflect your organization and experience.

Track → Inventory → Item → Edit

Add a photo to an inventory item

  1. 1Open the item and choose Edit.
  2. 2Select Add photo and upload a well-lit image of the item, package, or label.
  3. 3Use one photo that helps a picker distinguish this item from similar items; include the SKU or model label when useful.
  4. 4Save the item and return to the item detail page.
  5. 5Open the photo from the item detail page to confirm it is attached to the correct SKU.
You should see: The photo is available to people picking or counting stock. Never use a customer’s personal photo as an item image.
Inventory item form
Example screen — your records and totals will reflect your organization and experience.

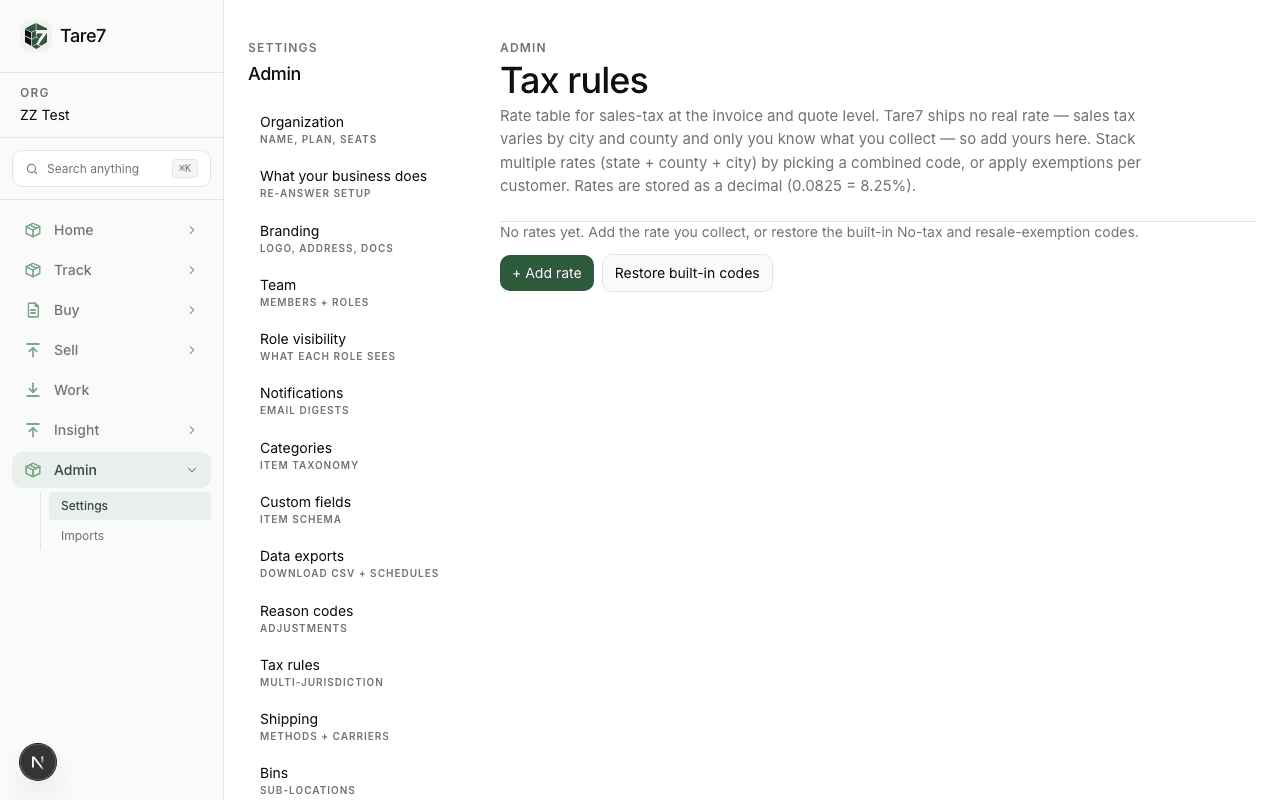
Admin → Tax rules

Set tax and selling defaults

  1. 1Open Tax rules and choose Add rule.
  2. 2Enter a recognizable name, jurisdiction, rate, and whether the rule applies to sales, purchases, or both.
  3. 3Save the rule, then open the item or workspace default and select it.
  4. 4Create a test quote or sale and confirm the tax line before using it with a customer.
  5. 5If the amount is wrong, void the draft, correct the rule, and create a new draft rather than editing a completed document.
You should see: New documents use the selected rule while preserving the rate that was used on completed records.
Add tax rule form
Example screen — your records and totals will reflect your organization and experience.

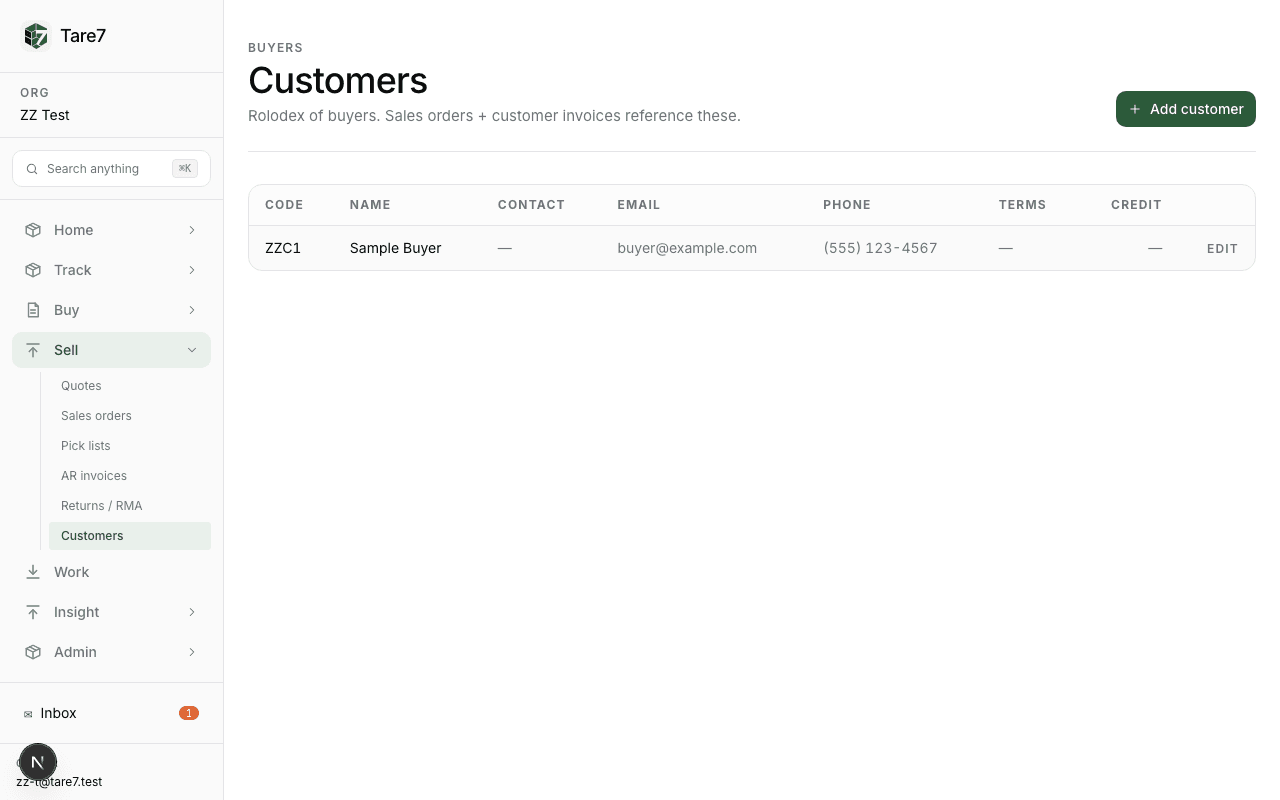
Search / jump to anything

Find a record when someone calls

  1. 1Use the search field in the left rail.
  2. 2Search by customer name, SKU, order number, job number, or invoice number.
  3. 3Open the matching record and confirm the organization and location before changing anything.
  4. 4Use the record’s tabs or history to see status, documents, and movements.
  5. 5If the record is missing, check the workspace filter and date filter before creating a duplicate.
You should see: You can answer the customer from the original record instead of starting a second one.
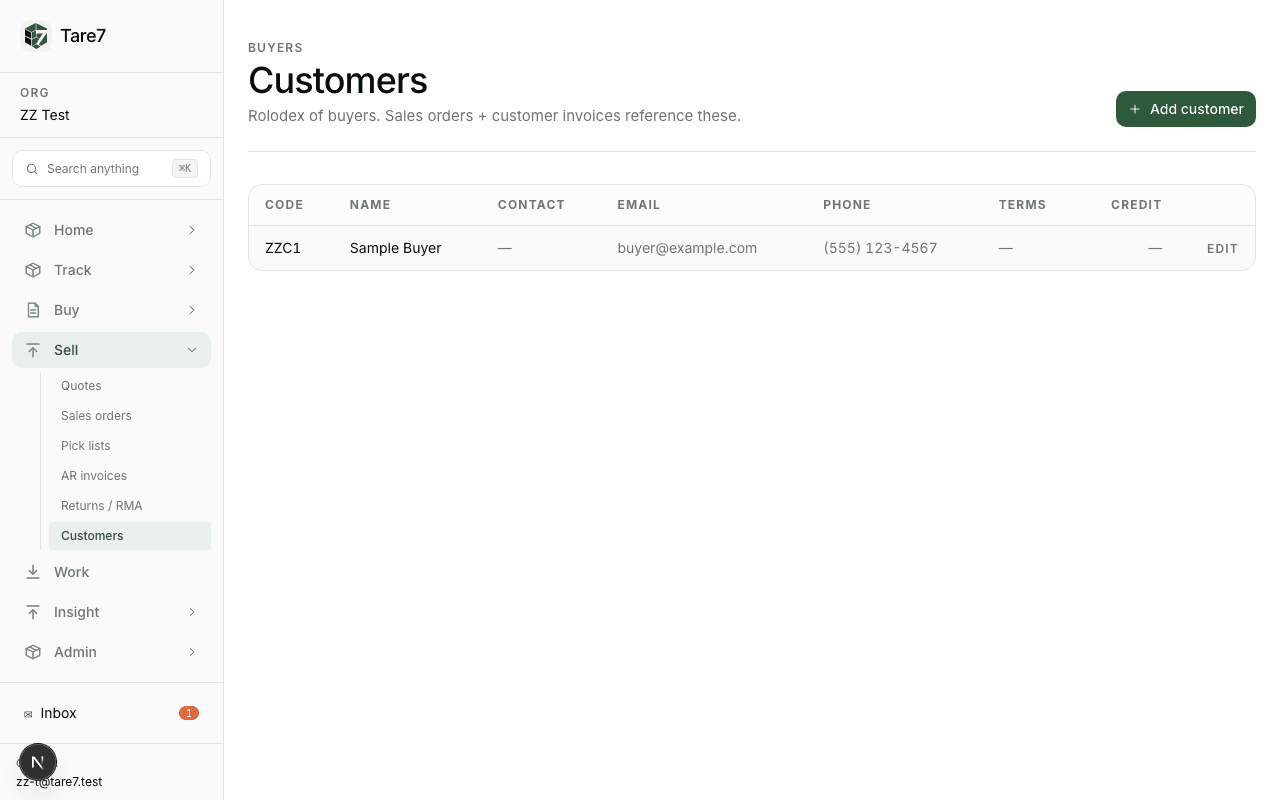
Customer list
Example screen — your records and totals will reflect your organization and experience.

Troubleshooting

When the result is not what you expected.

Check the experience

Confirm the organization and experience in the left rail before retrying.

Check the record history

Open the item, job, order, or customer and review its status and movement history.

Send useful context

Share the URL, exact step, visible message, and approximate time with support. Never send a password or secret key.

Looking for the sales-call walkthrough instead? Start with the experience guides; demo accounts are intentionally kept out of the customer instructions.